How to Gather Blue Mussels
A beginner's guide to picking wild blue mussels off intertidal rocks and pilings at low tide - the easiest, cheapest shellfish there is - with the biotoxin safety that mussel gathering absolutely demands.
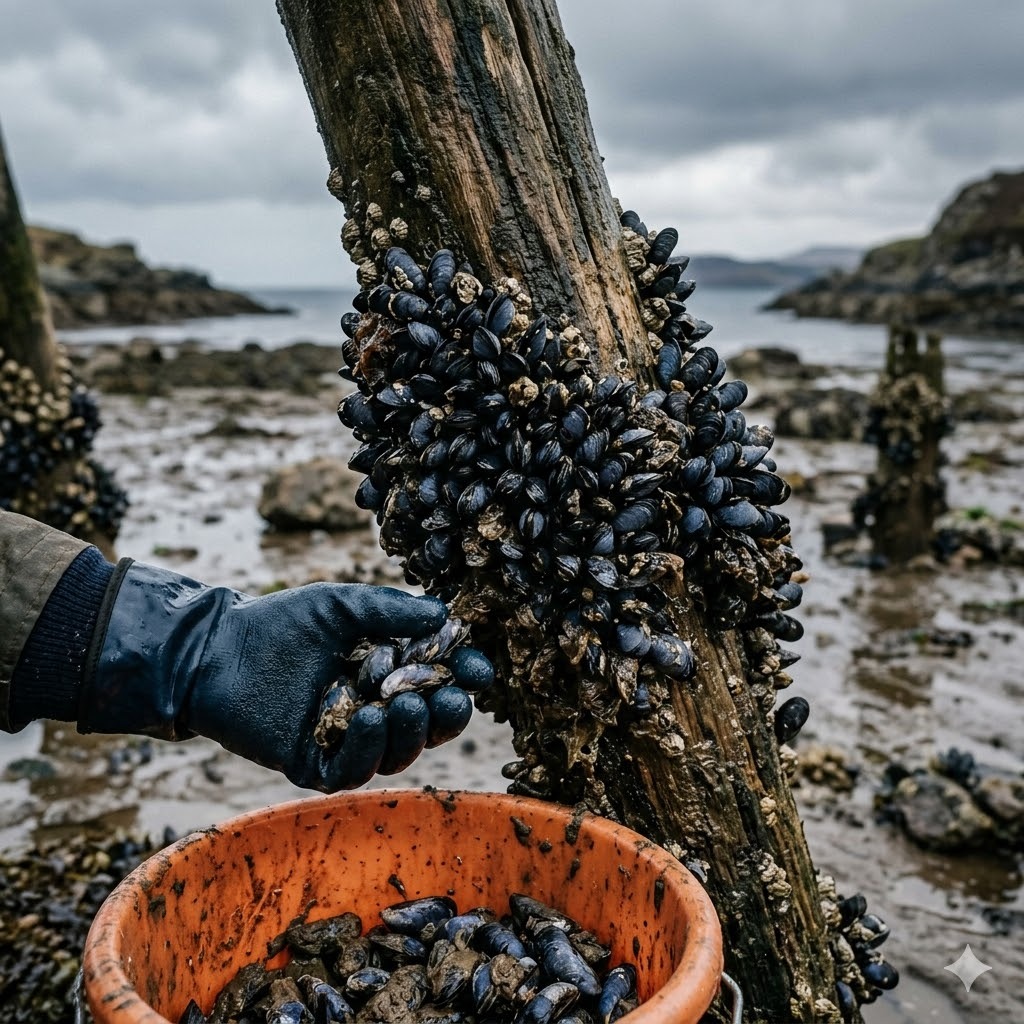
🔴 Mussels are among the most sensitive to red-tide/PSP toxins - only harvest from officially open, approved waters and heed every advisory. Discard any that stay open before cooking or open after.
Blue mussels are the shellfish that most people gather first, and for good reason. They blanket intertidal rocks, pilings and jetties in dense blue-black beds, they stay put, and at low tide you can pick a bagful by hand in minutes. There is no cheaper, easier or more reliably available wild shellfish along temperate coasts. For a total beginner, a productive mussel bed is close to a guaranteed meal.
That ease can lull you into forgetting the one thing that matters. Mussels are filter feeders, and they are among the most sensitive of all shellfish to the toxins that cause paralytic shellfish poisoning (PSP) - so sensitive that they are often used as the "early warning" species that monitoring programmes watch. A mussel from clean, officially open water is a cheap, superb feed; a mussel from closed or bloom-affected water can be genuinely dangerous, and no amount of cooking will fix it. This guide covers where to find them and how to pick, clean and steam them, but the safety section at the end is the part that keeps you well. Read it first.
Why go for blue mussels
The appeal starts with sheer availability. Blue mussels grow in huge, densely packed beds, anchoring themselves to hard surfaces with tough threads called the "beard" or byssus. Where conditions suit them they cover rock and timber so completely that gathering a meal is a matter of minutes, not hours, and they turn up on all sorts of accessible shoreline - which makes them the natural first step into the wider Shellfish and Crustaceans section.
They are also excellent, forgiving food. Steamed open in a little wine, cider or stock with garlic and herbs, blue mussels are one of the great simple seafood dishes, and the cooking liquor becomes a sauce in its own right. They cook in minutes and reward very little effort. Because they are so cheap and plentiful, they are also the ideal shellfish to learn good habits on: sorting live from dead, cleaning properly, and reading the safety status of the water.
There is a satisfaction, too, in gathering something so abundant so lightly. A large bed can give up a meal without you making any visible dent in it, provided you pick sensibly and leave the small ones. It is low-impact, low-cost eating that connects you directly to the shore.
Where and when to find them
Look for hard intertidal surfaces exposed at low tide: rocky shores, boulders, harbour walls, jetty legs, bridge pilings and old timber. Blue mussels favour the mid-to-lower intertidal, so they are covered at high water and exposed as the tide drops. Their beds are unmistakable once you have seen one - a dense, blue-black carpet of tightly packed shells, often glistening and dripping as the water recedes.
The tide sets your schedule. Aim for a low tide, ideally a bigger spring tide around the new or full moon, and arrive while the water is still falling so you have time to work before it turns. As with all intertidal gathering, check your tide tables and know your exit before you go out, because rocks and soft margins can strand you fast once the tide comes back.
Seasonally, cooler months are generally better for both quality and safety. Warm summer water softens spawning mussels and, far more importantly, is the peak season for harmful algal blooms and for bacteria. Because mussels concentrate PSP toxins so readily, warm-season blooms are exactly when a mussel bed can turn dangerous while looking perfectly normal. Cooler water tends to be safer and the mussels plumper - but "tends to" is never a substitute for checking the official status of that specific water on that specific day.
How to gather them
Picking is as simple as shellfish gathering gets. At low tide, take hold of good-sized mussels and twist or pull them free of the rock, snapping the beard where it anchors. You can lift small clumps at once, then separate them into your bucket or mesh bag. There is no tool required, though a bag that drains and a pair of gloves make the job cleaner and safer.
Select as you pick. Keep mussels that are firm and tightly closed, and leave the small ones on the rock to grow on - they anchor the bed and provide next season's harvest. Spread your picking across the bed rather than clearing one patch to bare rock. Discard, then and there, any that are already gaping open and will not close when handled, any with broken shells, and any that feel suspiciously light or rattle (often dead or full of mud).
Rinse your keepers in clean seawater to knock off grit, and keep them cool and damp on the way home - a shaded mesh bag or a bucket with a wet cloth over the top is ideal. Cut-resistant gloves are worth wearing, because mussel shells and the barnacle-crusted rock they cling to are sharp and will nick unprotected hands. Good footwear protects your feet on the same ground.
Handling, cleaning and cooking
At home, work through the mussels one at a time under cold running water. Scrub each shell to remove grit, barnacles and weed, and pull away any remaining beard by tugging it firmly towards the hinge. This "debearding and scrubbing" step is quick and makes all the difference to the finished dish. As you go, do the live-or-dead check: a healthy mussel is closed, or closes slowly when tapped or squeezed. Discard any that stay open and unresponsive, and any with cracked shells.
Keep the cleaned, live mussels cold in the fridge under a damp cloth - never sealed in water or an airtight bag, which suffocates them - and cook them the same day for the best results. Do not cook any mussel that was already dead before cooking; sorting them properly beforehand is how you keep the pot safe.
Cooking is fast and simple. Steam them in a covered pot with a splash of wine, cider or stock, some garlic, shallots and herbs, over a high heat for just a few minutes until the shells open. Here is the golden rule of the pot: after cooking, discard any mussel that has stayed firmly shut. A mussel that will not open after steaming was very likely dead beforehand, and should go in the bin, not on the plate. Serve the rest with the cooking liquor and plenty of bread. For more ideas on taking a shore harvest to the table, see the catch and cook guide.
Safety and the law
This is the section that matters most. Mussels are filter feeders that pump large volumes of seawater through their bodies and concentrate whatever it contains - and they are among the most sensitive of all shellfish to the biotoxins that cause paralytic shellfish poisoning (PSP), the "red tide" family of toxins. They are so sensitive that monitoring programmes often use mussels as the sentinel species, the first to show contamination. They also concentrate bacteria, including Vibrio in warmer months. A dangerous mussel looks, smells and tastes exactly like a safe one.
Only ever gather from waters that are officially open and classified as approved for shellfish by the relevant authority, and check that status every single time you go - not once a season, every trip. Classifications open and close with rainfall, sewage overflows, algal blooms and water temperature, so a bed that was safe last week may be closed today. Learn how to check your local shellfish sanitation programme or fisheries body, avoid gathering near storm drains, marinas, sewage outfalls or after heavy rain, and if you cannot confirm the water is open, do not gather there.
Understand what cooking does and does not do, because with mussels this is the crucial point. Thorough cooking kills bacteria such as Vibrio. But cooking, freezing and lemon juice do nothing whatsoever to destroy PSP biotoxins - a toxic mussel is just as dangerous steamed as raw. Since mussels concentrate these toxins so readily, the official open/closed classification is your only real protection, and it must be checked before every single outing. There is no home test and no visual clue; if the water is closed or you cannot confirm it is open, do not gather or eat mussels from it, cooked or not.
Then the ordinary rules. Most places require a recreational shellfish licence or permit and set size and daily bag limits, so confirm the regulations for your exact location before you gather. Wear cut-resistant gloves, mind the rising tide and your footing on slick rock, and take only what you will use. For the full detail on biotoxins, bacteria, closures and how to read advisories, see the dedicated shellfish safety guide, and pick up cut-resistant gloves, a draining mesh bag and wading footwear from the gear page before you head out.