Installing a Kayak Fish Finder
A fish finder transforms a kayak from a paddle craft into a hunting platform. Done right, the install is clean, secure, and removable. Done wrong, you end up with leaks, drained…
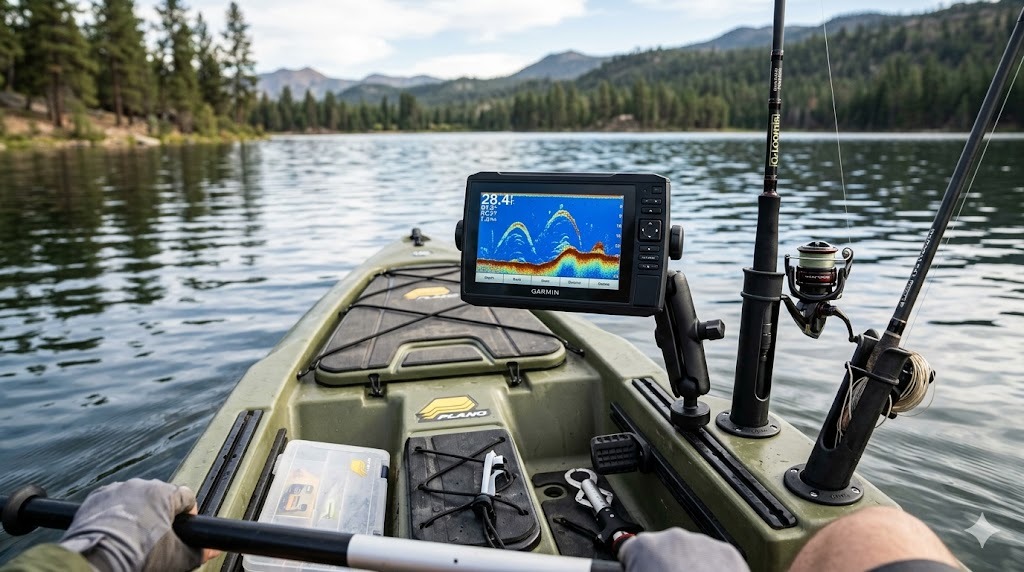
A fish finder transforms a kayak from a paddle craft into a hunting platform. You see depth, structure, baitfish, and the freshwater and saltwater gamefish that would otherwise be invisible. Done right, the install is clean, secure, and removable. Done wrong, you end up with leaks in the hull, drained batteries, transducers that read garbage, and screens that flop around in chop.
This guide walks through the full install - choosing a unit, mounting the head, installing the transducer, powering the system, and routing cables - so you end up with a clean and reliable kayak electronics setup.
Choosing the Right Fish Finder for a Kayak
A kayak’s small deck, limited power, and exposure to water rule out many traditional bass-boat units. Look for:
- Compact 5-7 inch screen - Larger screens are nice but heavier, harder to mount, and use more power.
- Built-in GPS - Marks waypoints, follows tracks, useful even without expensive charts.
- CHIRP sonar - Standard on all modern units; clearer depth and target separation.
- Side imaging or Down Imaging (optional) - Adds expense and complexity but reveals structure beautifully.
- Waterproof rating IPX7 or better - Will get wet.
Recommended Models
- Garmin Striker 5cv / 7sv - Budget winner, simple, reliable, built-in GPS, CHIRP + ClearVu.
- Lowrance HOOK Reveal 5/7 - Versatile, autotune sonar.
- Humminbird Helix 7 CHIRP G4N - Slightly bigger, side imaging available.
- Garmin ECHOMAP UHD 73sv - Premium kayak choice with full mapping and side imaging.
- Lowrance Elite FS 7 - High-end touchscreen with all features.
Where to Mount the Head Unit
The screen should be visible from the seat without straining and out of the casting arc.
Common Locations
- Between your knees on a Scotty or RAM ball mount in a flush-mount track.
- Forward console on a recessed mounting plate (common on Hobie Pro Angler, Old Town Sportsman).
- Side track with a RAM arm for offset viewing.
Mounting Hardware
- RAM ball mounts are the kayak standard - adjustable, vibration-resistant, removable.
- Scotty mounts snap into Scotty bases - easier removal, slightly less rigid.
- Direct screw mounts are simplest but require drilling into the deck.
Use stainless steel hardware and seal any deck penetrations with marine sealant (3M 4200 or LifeSeal).
Transducer: The Make-or-Break Choice
The transducer is what reads the bottom and finds fish. There are three placement options on a kayak.
1. Through-Hull (Shoot-Through)
Mount the transducer inside the hull, shooting through the plastic. Pros: no external transducer, no drag, completely protected. Cons: 10-30% signal loss through hull, dies in air or with hollow hull cavities.
How to do it: Find a flat spot inside the hull. Test by holding the transducer in a baggie of water against the hull and powering on. If the sonar reads bottom cleanly, mark the spot. Permanently mount with a marine epoxy or silicone “puck” with the transducer face down - no air gaps. Slow Cure marine epoxy or Marine Goop work; some kayakers use a wad of plumber’s putty for a removable install.
2. External Arm / Transom Mount
Use a bracket that mounts the transducer outside the hull, near the stern or on a scupper. Pros: full signal strength, easy to inspect/replace. Cons: drag, risk of damage on launch/landing, sometimes more complex install.
The RAILBLAZA Transducer Arm and Yak-Attack CellBlok+Battery Box+Transducer Arm are popular.
3. Scupper Mount
Many kayaks have scupper holes that allow a transducer to drop through with a dedicated kayak transducer puck (Garmin, Lowrance, Humminbird all sell scupper transducers). Pros: clean install, full water contact. Cons: must match the specific scupper diameter; transducer is exposed to dock launches.
For most kayak anglers, shoot-through is the cleanest install. Scupper mount is the easiest. External arm gives the best signal but adds drag.
Battery Power
Fish finders draw 0.5-2 amps depending on screen size. A small sealed lead-acid (SLA) or lithium battery powers a typical 5-7” unit all day.
Battery Options
- 7Ah SLA (sealed lead acid) - $20-30, heavy, simple, good for 6-10 hours.
- 9-12Ah SLA - More runtime, more weight.
- Lithium iron phosphate (LiFePO4) 7-12Ah - $80-150, half the weight, longer life, faster charging, more efficient.
Battery Box
Critical. The battery lives in a waterproof box (Pelican 1050, Yak-Attack CellBlok, dry box) with rubber grommets for cable pass-through. Internal fuse (3-5 amp inline) protects the unit.
Charger
Match charger to battery chemistry. Lithium needs a lithium-specific charger (Battery Tender, NOCO Genius).
Cable Routing
Clean cable routing prevents tangles, snags, and damage. Two main options:
Run Through the Hull
Drill a small hole, route the transducer cable in, seal with a rubber grommet or marine sealant. Clean look, harder to remove.
Surface Run with Cable Clips
Route cables along the deck channel and inside the cockpit, secured with adhesive cable clips. Easier to remove and modify; less clean visually.
For removable installs, surface-run with quick-disconnects so you can pull the system off for transport or storage.
Power Switch and Fuse
A small marine waterproof switch makes power-on simple and protects the battery from constant drain when stored. An inline 3-5 amp fuse between battery and unit prevents wiring fires.
Some systems integrate switch and fuse into one module - see YakAttack PowerCap, Bixpy or simple Blue Sea Systems components.
Step-by-Step Install
- Plan the layout. Mark head unit position, transducer position, battery box position, cable route.
- Test the head unit and transducer before mounting - confirm everything works.
- Install head mount. RAM base or Scotty base on a track or deck plate.
- Install transducer. Shoot-through requires careful test placement and epoxy mounting. Scupper or arm mounts go in their dedicated location.
- Install battery box in a dry, accessible location (often behind the seat).
- Wire the system: battery to fuse to switch to head unit. Use marine-grade connectors (heat-shrink butt connectors).
- Connect transducer cable to the head unit. Coil and secure excess cable.
- Test on water - confirm depth reading, sonar clarity, GPS lock.
- Adjust settings: auto-range, ping speed, color palette, side imaging range.
Common Mistakes
- Air gaps in shoot-through installs - sonar shows nothing or garbage. Re-mount with no bubbles.
- Loose battery connections - unit cuts out under load. Use heat-shrink connectors.
- Mounting too close to the propeller of a pedal kayak - pedal cavitation causes sonar noise. Move transducer forward.
- Cable strain - secure cables so a snag doesn’t pull connectors loose.
- No fuse - risks burning out the head unit or battery.
FAQ
Can I use a regular boat fish finder on a kayak? Yes, any unit will work. Compact 5-7” screens are easiest to fit and power.
How long will my battery last? A 9Ah SLA powering a 7” unit lasts 6-10 hours; 12Ah lithium pushes that to 10-15 hours.
Is side imaging worth it on a kayak? For dedicated kayak anglers fishing structure, yes - side imaging reveals brush piles, drop-offs, and roaming fish. For casual use, basic CHIRP is enough.
Will shoot-through work on a rotomolded kayak? Yes - the standard kayak hull material works with shoot-through if mounted with no air gaps.
Do I need a separate GPS? No - modern fish finders have built-in GPS that handles waypoints, tracks, and basic mapping. Higher-end units add detailed lake maps.
Conclusion
Installing a fish finder on a kayak is one of the highest-ROI upgrades for kayak fishing, and it pairs well with dialing in when the fish are most likely to feed before you launch. With a sub-$300 unit, a 9Ah battery in a dry box, and clean shoot-through transducer mounting, you gain depth, structure, and waypoint capability that rivals what bass boats had a decade ago. Take the time to do the install cleanly - proper mounting, sealed cable runs, and a fused power system - and your kayak electronics will work for years of fishing.
🛒 Recommended Gear on Amazon
- Kayak fish finders - browse current options and reviews on Amazon.
- Kayak transducer mount - browse current options and reviews on Amazon.
- 12V lithium battery - browse current options and reviews on Amazon.
As an Amazon Associate, we earn from qualifying purchases - at no extra cost to you. This helps us keep producing free, in-depth guides.