Fly Tying for Beginners
Fly tying turns fly fishing from a tackle-shop transaction into a craft - and saves money once you build a basic kit. Here is the gear, tools, and first five patterns every beginner…
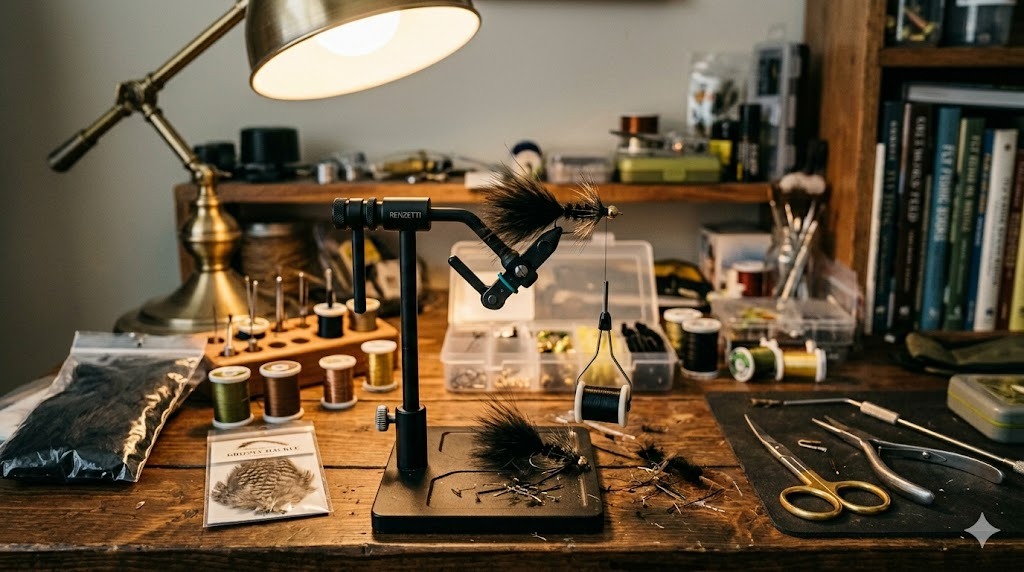
Fly tying turns fly fishing from a tackle-shop transaction into a craft. With a basic kit and a few hours of practice you can produce flies that catch fish as well as the commercial versions - and far better when you start matching local hatches and tying specific patterns that big-box stores don’t carry. It also saves money in the long run, especially for streamers and warmwater patterns where each fly costs $3-7 retail.
This guide covers the essential tools, the materials worth investing in early, and five beginner-friendly patterns that catch fish from your first sitting at the vise.
Why Tie Your Own Flies
- Customization - Tie exactly the size, color, and weight you need.
- Local match-the-hatch - Replicate bugs you actually see on your river.
- Cost - A bobbin of thread, hooks, and a hackle pelt produces dozens of flies for the price of a few store-bought ones.
- Satisfaction - Catching a fish on a fly you tied is uniquely rewarding.
- Quality - You can build flies tougher than mass-produced versions.
The Vise
The vise holds the hook while you wrap materials around it. A good vise is the foundation of the kit.
Vise Types
- Standard fixed-jaw - Simple, affordable. Renzetti Apprentice, Griffin Odyssey, Peak Rotary.
- Rotary - The jaws rotate around the hook shank, letting you wrap materials evenly and inspect both sides. Renzetti Traveler, Peak Rotary, Norvise.
- True rotary - The rotation axis aligns with the hook shank so you can wrap without rolling the bobbin around. Renzetti Traveler 2300, Stonfo Transformer.
Recommended Starter Vises
- Peak Rotary Vise - $200 - Solid US-made rotary, lifetime warranty.
- Renzetti Apprentice - $130 - Reliable starter rotary.
- Griffin Odyssey Spider - $80 - Budget rotary that performs well.
- Wolff Indiana Atlas - $50 - Basic but functional fixed-jaw.
Avoid the cheap kit vises bundled in beginner sets - they wobble, slip on hooks, and frustrate new tyers.
The Tools
Bobbin
Holds your thread spool and lets the thread feed smoothly. Get a ceramic-insert bobbin (Tiemco, Wapsi). $10-25.
Scissors
Sharp fine-tip scissors for trimming thread and materials. Anvil Razor or Dr. Slick Razor Scissors. $15-30.
Bodkin / Dubbing Needle
A long needle for picking dubbing, applying head cement, freeing trapped fibers. $5.
Whip Finisher
Tool that ties the final knot that secures your thread at the head of the fly. Matarelli whip finisher (the industry standard). $15-25.
Hackle Pliers
Grip the small end of a hackle feather while you wrap it. Spring-style or rubber-tip. $5-15.
Hair Stacker
Aligns the tips of deer or elk hair for tails and wings. Brass or aluminum. $10-20.
Bobbin Threader
Pulls thread through the bobbin tube. $3.
A starter kit from Loon or Dr. Slick bundles these for $50-80.
The Materials
Build slowly. Don’t buy a giant materials kit - most of the contents won’t get used.
Thread
- 8/0 Uni-Thread (or equivalent) - Standard for small to medium flies.
- 6/0 Uni-Thread for larger flies.
- Colors to start: black, brown, olive, white, red.
Hooks
- Dry fly hooks (Tiemco TMC 100, Dai-Riki 305): sizes 12, 14, 16, 18.
- Nymph hooks (TMC 5262, Daiichi 1710): sizes 12, 14, 16.
- Streamer hooks (TMC 5263, Daiichi 1750): sizes 4, 6, 8.
Dubbing
- Hare’s Ear dubbing in tan, gray.
- Synthetic dubbing like Wapsi Antron in olive, brown, black, gray.
Hackle
- Dry fly saddle/cape - Whiting Farms or Metz, grizzly and brown. $50-80 for a quality cape that ties hundreds of flies.
- Cheaper soft hackle - For nymphs and wet flies.
Materials for Streamers
- Marabou - Black, white, olive, brown.
- Bucktail - Various colors.
- Krystal Flash and Flashabou.
Misc
- Bead head beads in copper, gold, black, sizes 1/8 to 5/32.
- Lead-free wire for weight.
- Head cement / UV resin to secure thread wraps.
A starter material kit from a fly shop ($60-120) covers most of this in one purchase.
First Five Patterns
1. Woolly Bugger
The most versatile fly ever tied. Catches trout, bass, panfish, smallmouth bass, and northern pike. Olive, black, or brown. Sizes 6-10.
Steps:
- Crimp barb, mount hook in vise.
- Wrap thread base from eye to bend.
- Tie in marabou tail at the bend (length = hook shank).
- Tie in a piece of saddle hackle and wire by the tip at the bend.
- Dub a body of chenille from bend to eye, leaving room for a head.
- Palmer the hackle forward in evenly spaced wraps. Tie off and trim.
- Counter-wrap the wire forward to secure the hackle. Tie off and break off the wire.
- Wrap a thread head, whip finish, head cement.
A finished Woolly Bugger looks like a leech, baitfish, crayfish, or large nymph - fish read it as food in many ways.
2. Pheasant Tail Nymph
The most universal mayfly nymph imitation. Sizes 14-18.
Steps:
- Mount hook. Optional: slide a small bead onto the hook.
- Tie in a few pheasant tail fibers as a tail at the bend.
- Wrap thread forward to the thorax position.
- Wrap the pheasant tail fibers forward as the body. Tie off at the thorax.
- Tie in more pheasant tail fibers pointing forward (will become legs and wing case).
- Dub a small thorax of peacock herl or hare’s ear dubbing.
- Pull the pheasant fibers over the thorax as a wing case, tie off.
- Split the remaining fibers to the sides as legs.
- Whip finish and cement.
3. Elk Hair Caddis
The most fishable dry fly for beginners. Sizes 12-16.
Steps:
- Mount hook. Tie thread base from eye toward bend, stopping above barb.
- Tie in a length of brown or grizzly hackle at the bend.
- Dub a body of tan or olive dubbing forward, leaving room for the wing.
- Palmer the hackle forward over the body. Tie off and trim.
- Stack a small clump of elk hair (cleaned and combed). Measure for a wing length about equal to the hook length.
- Tie in the elk hair wing over the back; trim butts to form a small head.
- Whip finish and cement.
4. San Juan Worm
Possibly the simplest effective fly. Trout food after rain stirs up the bottom.
Steps:
- Mount a curved scud hook.
- Tie thread base in the middle of the shank.
- Take a 2” length of red or pink ultra-chenille; tie it on so half extends forward and half rearward.
- Wrap thread to one end, then the other to secure.
- Whip finish.
A worm tied in 30 seconds.
6. Clouser Minnow
The most universal baitfish fly. Catches everything from trout to striped bass.
Steps:
- Mount streamer hook.
- Tie in two small lead dumbbell eyes on top of the hook just behind the eye, using figure-eight thread wraps.
- Flip the hook over (hook point now faces up - Clouser inversion).
- Tie in white bucktail along the top.
- Tie in some Flashabou or Krystal Flash.
- Tie in chartreuse or olive bucktail on top.
- Wrap thread head, whip finish, cement.
The dumbbell eyes flip the hook upside down, making the Clouser snag-resistant in rocks and weeds.
Practice Patterns and Habits
- Tie 6 of each pattern before moving on. Repetition cements technique.
- Match a pattern to your local water. Black wooly bugger for the river you fish; size 16 BWO for the river up the road.
- Keep a tying journal. Note what worked.
- Watch tutorials. Tightline Productions, In The Riffle, and Fly Fish Food on YouTube are free encyclopedias.
FAQ
How much does a starter fly tying setup cost? $200-400 for a quality vise, tools, and starter materials - recouped in saved fly purchases within a season.
Should I buy a beginner kit? Skip the cheap all-in-one kits. Buy a quality vise and individual tools - the kits have flimsy vises and limited materials.
How long until I tie sellable-quality flies? After tying 50-100 of a single pattern, flies look professional. Within a month of regular tying, most beginners produce fish-worthy flies.
Best beginner pattern? Woolly Bugger. Forgiving, useful, teaches palmer hackle and tail tying.
Do I need to match local hatches? For trout, yes - match-the-hatch matters. For bass, panfish, and warmwater fish, generic attractor patterns work fine.
Conclusion
Fly tying is a craft that rewards patience and saves money. Start with a quality vise, a few essential tools, and just enough materials for five patterns. Master the Woolly Bugger, Pheasant Tail, Elk Hair Caddis, San Juan Worm, and Clouser Minnow, and you have flies that catch nearly every freshwater species. Each fish caught on a fly you tied is a small victory of skill over store-bought convenience - and the addiction grows from there.
🛒 Recommended Gear on Amazon
- Beginner fly tying kit - browse current options and reviews on Amazon.
- Fly tying vise - browse current options and reviews on Amazon.
- Fly tying materials - browse current options and reviews on Amazon.
As an Amazon Associate, we earn from qualifying purchases - at no extra cost to you. This helps us keep producing free, in-depth guides.